
If you don’t currently run Linux on your desktop I would strongly suggest it. Try Fedora or Ubuntu. If you don’t want to run Linux permanently but do want to try this method then a Live Boot CD of Fedora or Ubuntu (or any other Linux OS of your choice) would be an ideal method.
Servers in datacenters are extremely unlikely to experience filtering so by tunnelling your connection through to a server you can browse the Internet without worrying if your connection is being restricted or surveilled.
IMAGE
Signing up with Digital Ocean
Navigate to www.DigitalOcean.com and click the Signup button at the top of the page. Enter an email address and a password. You may want to use an anonymous email provider such as Hushmail.com to protect your privacy and a strong password you’ve not used anywhere else. Important: The email address must be real as your server password will be emailed to you.
 Once logged in you’ll have access to the initial control panel;
Click get started which will take you to the billing page, you can either use a credit card (you may want to use an anonymous Visa / Mastercard, search online for keywords such as prepaid, anonymous etc) or PayPal.
Once your payment is processed and cleared (check billing for tracking your pre-paid balance if using PayPal) or refresh the droplets page to see the below;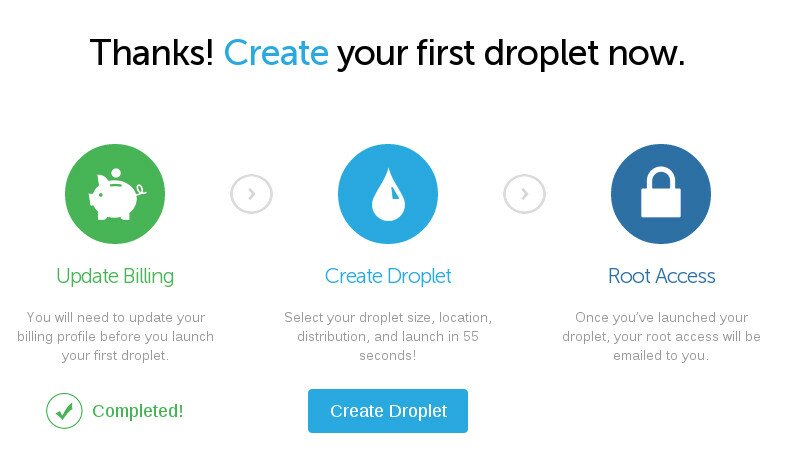
Click Create Droplet!
Choose a friendly name for the server (aka Droplet), this name is not important feel free to use how-to.survivetheclaireperryinter.net if you want to. Leave the Size option alone (or if a larger size is selected change to to 512Mb/20Gb/1Tb as this is only $5 / £3 a month). For lower latency and a reduced chance of NSA eavesdropping choose an Amsterdam datacenter (not necessary but recommended).
Scroll down for more settings. For the purposes of this tutorial choose CentOS and then the latest CentOS version (currently 6.4) then click Create Droplet. 
After a few seconds of watching the following screen your server will be created and you should have received an email with your root password.
Behold your new server, make note of the IP address at the top near the word active. In this case the IP address is 95.85.54.190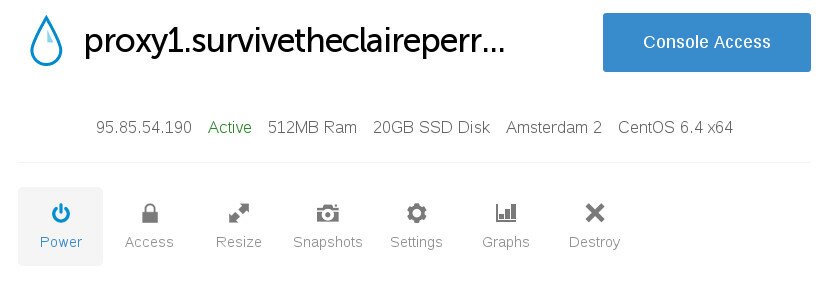 Check your inbox and you should have an email with the IP address, the user name (root) and your password. It’s very important you don’t write a blog post and publish your username and password because bad things will happen to your server
Now we’re ready to create a proxy.
Testing the Proxy / Tunnel
Assuming you are logged into your Linux computer load up a terminal. Type the following;
ssh -D 8080 [email protected]
Replace the IP address with your own. You’ll be informed that the authenticity of the host can’t be established which is true because you don’t know what the RSA key fingerprint is. You can choose to accept it and continue or be paranoid and bail. If you chose to continue you will be prompted for you password that was sent by email.
Load up another terminal (or a tab) and type the following;
curl --socks5-hostname 127.0.0.1:8080 http://wtfismyip.com/json
You should see the following output indicating that your ISP is Digital Ocean.
You could immediately configure your browser etc to use these settings but you should try and be a bit more thorough.
Configuring the Proxy / Tunnel for long term use
Exit all of the terminals opened in the previous step which will close all tunnels and SSH sessions and we’ll get started on making this a little more secure.
First things first is to change the root password from the one that was emailed to you. Load up a terminal and ssh in;
ssh [email protected]
Once logged in change the password with the passwd command. Ensure you use a different password to anything else you have. The root user is the most powerful user on a Linux server and can delete anything and everything so you really don’t want to be using it for everyday tasks. For creating the tunnel we want to use a non-privileged user. To do this simply type the following (feel free to replace the name tunnel with your name or anything, it’s just a username and isn’t important);
useradd tunnel
Now change the password for this user by passing the username to the passwd command used earlier, make sure you use a strong password and one that isn’t that same as any of your others;
passwd tunnel

Load up a new tab on your local machine and try logging in as your new user;
ssh [email protected]

You’re now ready to setup a tunnel/SOCKS proxy you can use with your browser.
Exit all your terminals again and this time issue the command;
ssh -D 8080 [email protected]
In a new terminal check that the proxy is working by issuing the CURL command again;
curl --socks5-hostname 127.0.0.1:8080 http://wtfismyip.com/json
For this example I’m going to use Firefox but feel free to try it out with others. In the address bar type about:config, you’ll be presented with the following screen;
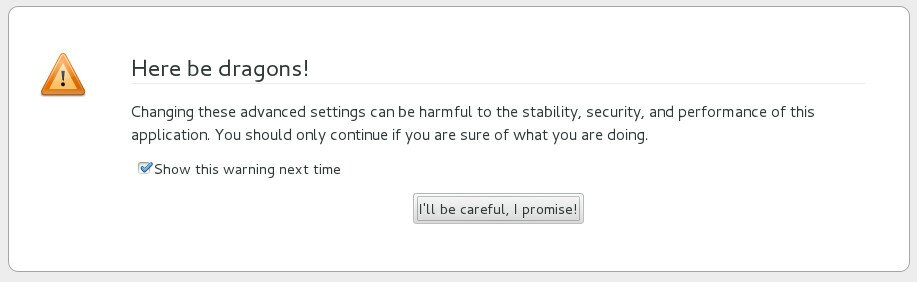
Assuming you are going to be careful click the button.
In the Search bar at the top type proxy, then look for the strings network.proxy.socks and network.proxy.socks_port, type in the values from the command above (127.0.0.1 and 8080). If your ISP filters DNS then you may want to toggle network.proxy.socks_remote_dns too (don’t forget to change your name servers!).
Finally change network.proxy.type to 1.
 To test, simply load up a new Firefox tab and attempt to access a blocked page.
So there you have it, an easy way to get past any Web filtering and as an added bonus since your traffic is encrypted between your computer and your server in Amsterdam neither your ISP nor the UK Government can monitor it.
Upcoming articles include creating a dedicated Raspberry PI proxy for use with multiple devices (phones, tablets, Windows PCs etc) and setup guides for other server providers. Make sure you follow @STCPI on Twitter for updates!