It is still possible to anonymously purchase on-line resources which will be useful for those wishing to frustrate Internet surveillance, evade Internet censorship or blow the whistle on something without risking the exposure of their identity.
Finding a pre-paid card that can be purchased in cash with no questions asked is trivially easy, any card or gift shop is likely to have them interspersed with Starbucks gift cards etc.
For this example we’ll choose a £50 VISA card which once you get to the till will actually cost £53.95. Hand over your cash and walk out of the door.
As you leave swing by a Three, EE, O2 or Vodafone store and buy a pre-pay data SIM. Three have a 1Gb SIM for £7.50, buy it with cash and walk out of the store.
By now the VISA card will have activated and should be good to go.
For extra anonymity you may wish to visit a local pawn broker like Cash Converters or CEX and acquire a phone, tablet or laptop so that the IMEI you use with the newly purchased SIM is not one that has previously been tied to your identity.
Open up your VISA card and you’ll notice it has an expiry date, the CVV code on the signature strip and the usual 16 digit credit card number.
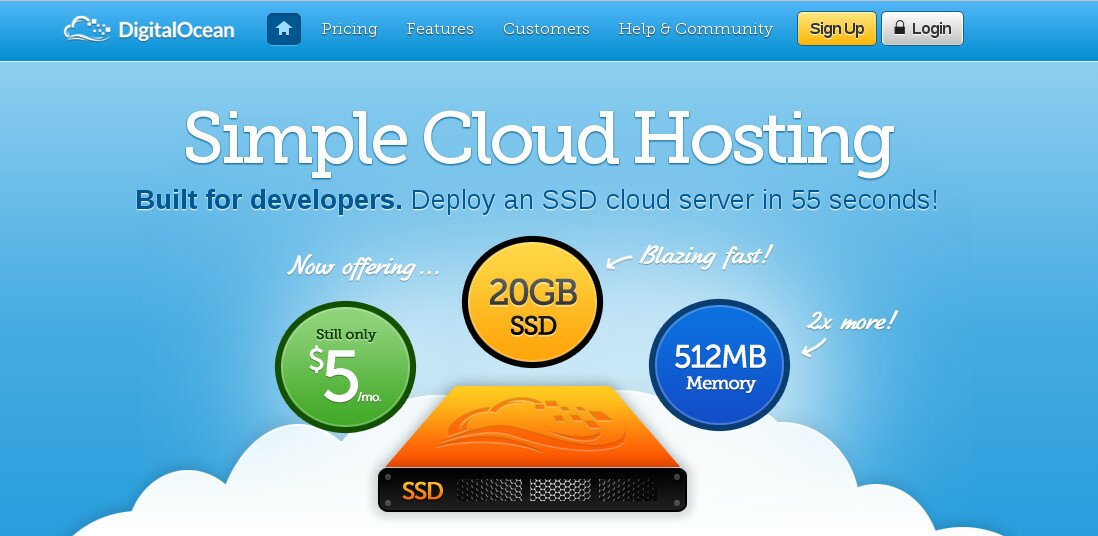
Setup your 3G connection, optionally install TOR to bypass any ISP restrictions that may be present then navigate to your VPS provider of choice. I’d suggest DigitalOcean.com but there are many others.
Signing up for an account is easy, put in an email address and a password (the email address will have to be a real one as it needs to be verified and it’s where your root passwords are sent but try signing up to something like HushMail.com).
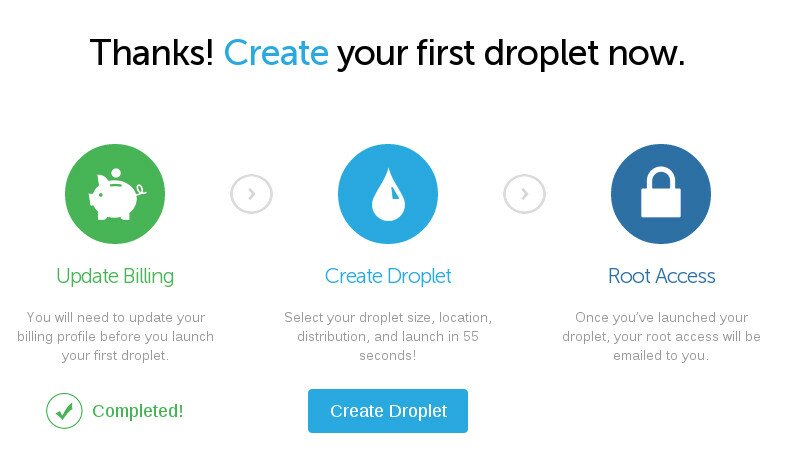
Once logged in you’ll be asked to verify your billing details;
Now it’s likely that your use of TOR and a prepaid VISA card will trigger anti-fraud protections; the account will be locked and a support ticket will be raised asking you to identify yourself
The people at DigitalOcean are very good and if you adequately explain your motivations (be it running a website you’d rather not have your name attached too, as a proxy for privacy etc) they are likely to accommodate you without requiring copies of ID or a credit card number tied to your identity. DO NOT ABUSE THEIR TRUST.
Within a few minutes the account will be unlocked and you can launch your virtual machine.
If you login to the VISA pre-pay system you’ll be able to see if the pre-authorisation passed and that you’ll be able to continue paying for your server resources.
You can now host your whistle-blowing blog, a critique of public policy or just use it as a proxy safe in the knowledge that there is virtually no trace back to your true identity.
Do not abuse this ability to do hateful or illegal things, the VPS provider may not be able to identify you but they will shut you down and may even choose to shutdown all other accounts that appear to be of a similar profile to yours. Your actions could prevent someone who genuinely needs this anonymity.
As mentioned on our Top Ways to Avoid Filters page the Onion Router Project (better known as TOR) excels at bypassing censorship technologies such as the Sky Broadband Shield, the TalkTalk filters, BT Parental Controls and even the Great Firewall of Cameron China whilst at the same time offering almost perfect anonymity.
TOR is an excellent choice for any would-be whistle blower, political journalist, privacy advocate, vulnerable adult or any other person who wants/needs unrestricted Internet access.
TOR is no more a tool for criminals than a kitchen knife or a car, much like encryption the more it is used by normal people for normal day-to-day tasks the better the protection for everyone by making it more expensive for nation states to perform blanket surveillance and Internet filtering.
This post will show you how to download and install the TOR client (which is easy) whilst also ensuring it’s the real deal and hasn’t been interfered with by your ISP or other malicious actors.
Downloading
The best place to download TOR is from the projects own website here: https://www.torproject.org/download/download-easy.html.en (note the https). You should also do whatever is necessary to acquire the signature file which can be found by following the link labelled sig(underlined in red below) on the download page.
The download is also available on this website by clicking here and the signature for this download is reproduced below.
At this point you could just install TOR and trust that everything is OK but in this day and age you should really make sure.
Verifying the Download
At this point you should go off and read about GnuPG on Wikipedia and consider reading the GnuPG manual so you fully understand why we’re about to do what we are going to do.
As we’re on Windows (you should consider trying Linux even if it’s only on a live boot CD/USB) we need to install GPG4WIN which can be downloaded here: http://gpg4win.org/download.html. Pay close attention to the SHA1 checksum you will need that shortly.
Secondarily download and install the Microsoft File Checksum Integrity Verifier from, here: https://www.microsoft.com/en-gb/download/details.aspx?id=11533
Luckily the Microsoft download will be signed and certified by a certificate already embedded in the OS so go ahead and install it, you should see that the publisher is “Microsoft Corporation” and if you click the blue text you should see a confirmation that the Digital Signature is OK;
Once extracted to a useful location (preferably the same place you downloaded the GPG4WIN installer to) execute the following command;
fciv.exe -sha1 gpg4win-2.2.1.exe
This will generate the SHA1 hash you noted earlier in a manner similar to that below, if the two hashes do not match exactly then something is wrong.
Now (assuming that the hashes match) we need to install GPG4Win, for added security you can ensure that the certificate is also genuine for the installer by clicking More Details then Show information about this publishers certificate. The default GPG4Win installs options should suffice;
Once installed load up the GNU Privacy Assistant or GPA from the All Programs > Gpg4Win section of the start menu. GPA allows you to import the public keys of the TOR developers who signed the TOR installer to guarantee that it is genuine and hasn’t been tampered with.
All the signing keys can be found on this page; https://www.torproject.org/docs/signing-keys.html.en if you are unable to reach that page then the key we want is from a developer named Erinn Clark whose key can be identified as 0x63FEE659.
To install her key select Server then Retrieve Keys from the GPA menu
In the popup box that appears type or paste 0x63FEE659 then click OK.
You should then be told that one 1 public key has been read and imported!
Select Erinn’s key from the list and look at the details, ensure that the fingerprint matches the one on https://www.torproject.org/docs/signing-keys.html.en or if you can’t reach that page this;
8738 A680 B84B 3031 A630 F2DB 416F 0610 63FE E659
If it does right click on her key and select Sign Key, this indicates that you trust this key for encryption and importantly for our purposes any signatures made.
You’re now ready to confirm if the TOR download is safe to install. Navigate to the location where you saved the TOR executable and the signature file, right click on the installer and navigate to More GpgEx Options then click Verify.
In the window that pops up click Decrypt / Verify, if all has been succesful you will see a green notice confirming that the signature passes.
You can now install TOR safe in the knowledge that the download has not been tampered with by malicious criminals or the surveillance state. Once installed you will now be able to evade any form of Government or ISP filtering.
Remember if you are using TOR to protect yourself as part of a whistle blowing exercise there are several warnings to take heed of to ensure that you do not jeopardise the work you’ve put in so far.
This article is for use on a Linux/Mac computer (desktop / laptop etc). A Windows guide will be available at a later date.
If you don’t currently run Linux on your desktop I would strongly suggest it. Try Fedora or Ubuntu. If you don’t want to run Linux permanently but do want to try this method then a Live Boot CD of Fedora or Ubuntu (or any other Linux OS of your choice) would be an ideal method.
Servers in datacenters are extremely unlikely to experience filtering so by tunnelling your connection through to a server you can browse the Internet without worrying if your connection is being restricted or surveilled.
IMAGE
Signing up with Digital Ocean
Navigate to www.DigitalOcean.com and click the Signup button at the top of the page. Enter an email address and a password. You may want to use an anonymous email provider such as Hushmail.com to protect your privacy and a strong password you’ve not used anywhere else. Important: The email address must be real as your server password will be emailed to you.
Once logged in you’ll have access to the initial control panel;
Click get started which will take you to the billing page, you can either use a credit card (you may want to use an anonymous Visa / Mastercard, search online for keywords such as prepaid, anonymous etc) or PayPal.
Once your payment is processed and cleared (check billing for tracking your pre-paid balance if using PayPal) or refresh the droplets page to see the below;
Click Create Droplet!
Choose a friendly name for the server (aka Droplet), this name is not important feel free to use how-to.survivetheclaireperryinter.net if you want to. Leave the Size option alone (or if a larger size is selected change to to 512Mb/20Gb/1Tb as this is only $5 / £3 a month). For lower latency and a reduced chance of NSA eavesdropping choose an Amsterdam datacenter (not necessary but recommended).
Scroll down for more settings. For the purposes of this tutorial choose CentOS and then the latest CentOS version (currently 6.4) then click Create Droplet.
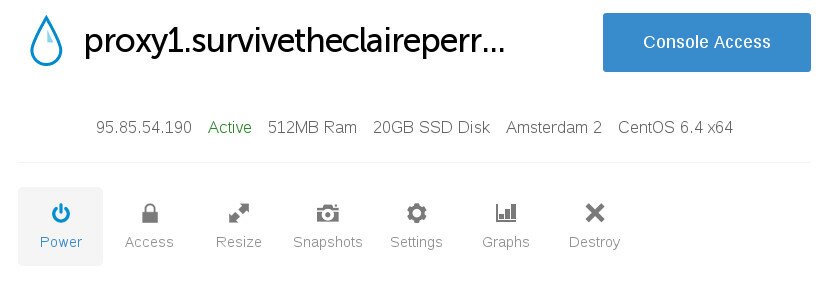
After a few seconds of watching the following screen your server will be created and you should have received an email with your root password.
Behold your new server, make note of the IP address at the top near the word active. In this case the IP address is 95.85.54.190Check your inbox and you should have an email with the IP address, the user name (root) and your password. It’s very important you don’t write a blog post and publish your username and password because bad things will happen to your server
Now we’re ready to create a proxy.
Testing the Proxy / Tunnel
Assuming you are logged into your Linux computer load up a terminal.Type the following;
Replace the IP address with your own. You’ll be informed that the authenticity of the host can’t be established which is true because you don’t know what the RSA key fingerprint is. You can choose to accept it and continue or be paranoid and bail. If you chose to continue you will be prompted for you password that was sent by email.
Load up another terminal (or a tab) and type the following;
You should see the following output indicating that your ISP is Digital Ocean.
You could immediately configure your browser etc to use these settings but you should try and be a bit more thorough.
Configuring the Proxy / Tunnel for long term use
Exit all of the terminals opened in the previous step which will close all tunnels and SSH sessions and we’ll get started on making this a little more secure.
First things first is to change the root password from the one that was emailed to you. Load up a terminal and ssh in;
Once logged in change the password with the passwd command. Ensure you use a different password to anything else you have.The root user is the most powerful user on a Linux server and can delete anything and everything so you really don’t want to be using it for everyday tasks. For creating the tunnel we want to use a non-privileged user. To do this simply type the following (feel free to replace the name tunnel with your name or anything, it’s just a username and isn’t important);
useradd tunnel
Now change the password for this user by passing the username to the passwd command used earlier, make sure you use a strong password and one that isn’t that same as any of your others;
passwd tunnel
Load up a new tab on your local machine and try logging in as your new user;
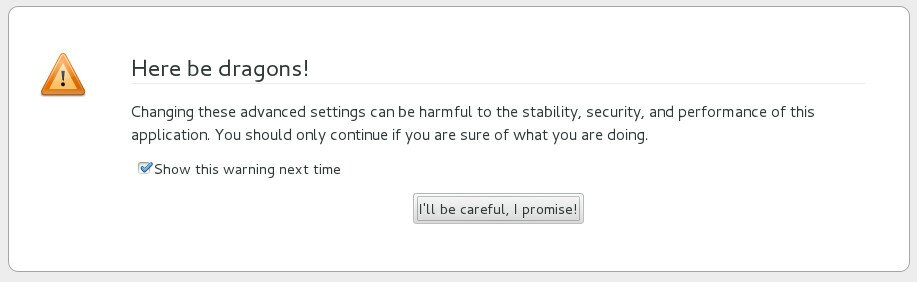
For this example I’m going to use Firefox but feel free to try it out with others. In the address bar type about:config, you’ll be presented with the following screen;
Assuming you are going to be careful click the button.
In the Search bar at the top type proxy, then look for the strings network.proxy.socks and network.proxy.socks_port, type in the values from the command above (127.0.0.1 and 8080). If your ISP filters DNS then you may want to toggle network.proxy.socks_remote_dns too (don’t forget to change your name servers!).
Finally change network.proxy.type to 1.
To test, simply load up a new Firefox tab and attempt to access a blocked page.
So there you have it, an easy way to get past any Web filtering and as an added bonus since your traffic is encrypted between your computer and your server in Amsterdam neither your ISP nor the UK Government can monitor it.
Traffic egressing the server can still be tracked and recorded. With the right combination of warrants and traffic capture at the Digital Ocean datacenter coupled with your home ISP logs illegal activity can still be traced back to you! Only use this to method to bypass filters,
Upcoming articles include creating a dedicated Raspberry PI proxy for use with multiple devices (phones, tablets, Windows PCs etc) and setup guides for other server providers. Make sure you follow @STCPI on Twitter for updates!